"Building a set of stairs ... distinguishes an accomplished carpenter from a novice."
~ from Do It Yourself Housebuilding: The Complete Handbook by George Nash
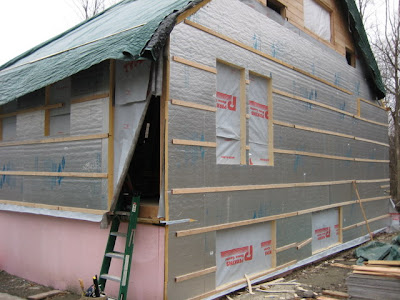
I took Friday off from work this weekend since the kids had gone to visit Mimi and Pop and go to the circus. The long range weather report for the Capital District on Monday was that the weekend would be sunny and warm, highs in the sixties. So that means it would likely be high forties, low fifties at the house, which would be a nice change.
By Wednesday, reports said Friday and Saturday would be warmish (mid to high fifties) and Sunday would be cooler, in the high forties. That could mean high thirties at the house. Brrrrr. But at least it was going to be sunny all weekend.
Thursday rolled around and the forecasts had retreated to fifties but raining on Friday and Saturday, then cooler and clearing on Sunday. Maybe the forecasters were trying to cheer us up with optimistic long range forecasts earlier in the week.
Since it was raining, we decided to start in on the stairs to the loft. We slept a little later than we normally would (because without the kids to wake us up, we could) and took our time getting to the house. After reading and rereading the information we had on stairs from FirstDay and our own resources (Do It Yourself Housebuilding: The Complete Handbook has a really good article on stair building), Wendy and I picked out two of our best 2x12s to use as stringers and went to work.
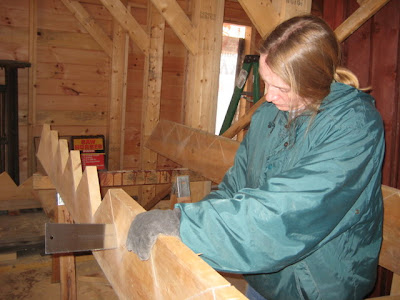
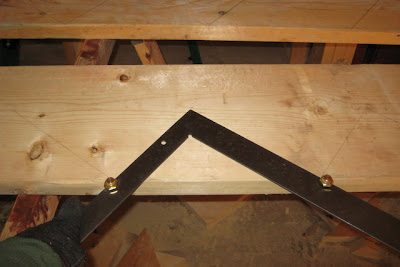
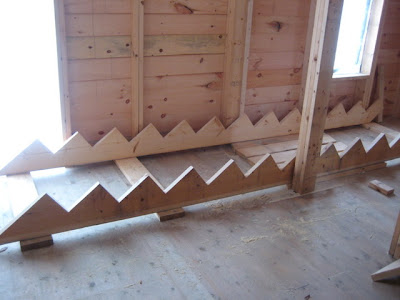
We laid out a set of stringers using the framing square lining up the rise and run each time and holding the square in place using my index fingers as guides and stops. I used the Skilsaw to cut cut the marked areas and Wendy used the pullsaw to clean up the corners where the circular saw couldn't get to. This seemed simple enough...
After getting a set cut out, we put the one atop the other and found that they didn't match. Not blatantly wrong, but bad enough - anywhere from an eighth of an inch to a half inch at one spot. I called Pop for a consultation, but we already knew we had to start over.
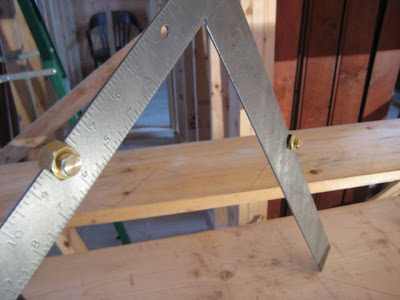
Pop asked if we had used stair guides, which I had seen mentioned in the Housebuilding book. When I told him we didn't, he suggested using them since it would help make sure that the measurements were all the same. Friday was shot at this point, and so I suggested we clean up and go to Home Depot to get a set of stair guides, and we would try again on Saturday. Stair guides are basically stops that you can set where you need them on the framing square and are secured with a thumbscrew. Once they are set, you can be assured that you have the same measurement each time you move the square down the stringer. At $5 for a pair, it they are definitely worth having if you are going to build stairs.
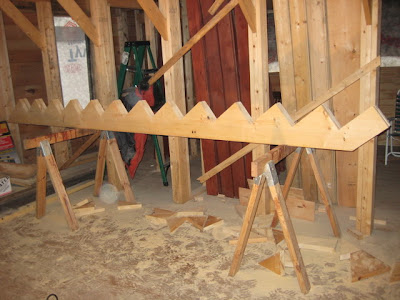
Saturday was warm and sunny when we woke up. By time we got out the door it had started raining, which we took as a sign that we should continue with stairs. We selected the best of the remaining 2x12s to use as stringers. I set the stair guides and we laid out the second pair of stringers. The FirstDay instructions state specifically not to use the first stringer as a template for the second one, so we laid them both out at the same time. I cut them with the Skilsaw even more carefully than the day before and Wendy had perfected getting the remaining wedges cut out cleanly.
As we put the stringers atop each other, I felt confident that these were much more accurate. Imagine our despair when this set didn't match either! In the depths of our madness we mixed and matched all four stringers and found that we actually had a pair (one from each day) that matched!
We tacked each stringer up in the bay to see if they fit and sat level. We did have to account for the fact that the gable wall framing outside of the bents is 2x6 stock on edge - this gave us about an inch gap from the stringer to the beam at the top which will have to be padded out with 1 inch stock, but I faked it with 3/4 plywood this time. We also had to take that into account where the stringers passed between the posts, since the extra inch would change how wide the treads should be. The stringers fit, but were slightly off level, and looking at them it seemed that the length of the stringer was off by an eighth of an inch or less.
While the stringers were hanging, we measured the narrowest point of the stair bay (between the interior post of the stair bay and the the gable wall framing) to find the tread width at that point, dictating the width of the stairway overall. I cut the treads from some of the 2x12 stock we had determined couldn't be used for stringers and then Wendy cut the risers with the compound sliding mitre saw while I took the stringers down and went over them, checking for non-square cuts.
On each stringer, the top cut was out of square by about an eighth of an inch, and so I laid out the lines needed to trim it up. Again the day was getting late and so I decided to leave that for Sunday.
We woke up Sunday to a cold, partly cloudy day. Given the fact that it would be a short day, as we had to leave at noon to pick up the kids from their weekend, we got up early and got to work. I shaved the edge off the stringers and test fitting them showed they now sat correctly. We pulled them down and got ready to assemble the stairs in the kitchen aisle when Wendy pointed out that we wouldn't be able to move the assembled stairs into the bay when we were done since the fit would be exact. That meant we had to clean up and move the scaffold frames and planks, which had been stored right near the back door. After an hour of moving and sweeping up the mounds of sawdust we created making stringers, we laid the stringers in place and started putting treads and risers on. We started with the top riser and then worked our way down, since the risers need to go down behind the treads. We got a couple of stairs done before it was 11:30 and we had to start cleaning up to go home.
After starting the first set of stairs, I am not ready to claim that we are accomplished carpenters. We still fall squarely into the novice category, but I have a healthy respect for the talent it takes to do stairs right. I also learned a whole lot about how it works, and have some ideas of how we will do the basement stairs (mostly gained from conversations with Pop), but I will leave that for another time since this post is so long already.
I took Friday off from work this weekend since the kids had gone to visit Mimi and Pop and go to the circus. The long range weather report for the Capital District on Monday was that the weekend would be sunny and warm, highs in the sixties. So that means it would likely be high forties, low fifties at the house, which would be a nice change.
By Wednesday, reports said Friday and Saturday would be warmish (mid to high fifties) and Sunday would be cooler, in the high forties. That could mean high thirties at the house. Brrrrr. But at least it was going to be sunny all weekend.
Thursday rolled around and the forecasts had retreated to fifties but raining on Friday and Saturday, then cooler and clearing on Sunday. Maybe the forecasters were trying to cheer us up with optimistic long range forecasts earlier in the week.
Since it was raining, we decided to start in on the stairs to the loft. We slept a little later than we normally would (because without the kids to wake us up, we could) and took our time getting to the house. After reading and rereading the information we had on stairs from FirstDay and our own resources (Do It Yourself Housebuilding: The Complete Handbook has a really good article on stair building), Wendy and I picked out two of our best 2x12s to use as stringers and went to work.
We laid out a set of stringers using the framing square lining up the rise and run each time and holding the square in place using my index fingers as guides and stops. I used the Skilsaw to cut cut the marked areas and Wendy used the pullsaw to clean up the corners where the circular saw couldn't get to. This seemed simple enough...
After getting a set cut out, we put the one atop the other and found that they didn't match. Not blatantly wrong, but bad enough - anywhere from an eighth of an inch to a half inch at one spot. I called Pop for a consultation, but we already knew we had to start over.
Pop asked if we had used stair guides, which I had seen mentioned in the Housebuilding book. When I told him we didn't, he suggested using them since it would help make sure that the measurements were all the same. Friday was shot at this point, and so I suggested we clean up and go to Home Depot to get a set of stair guides, and we would try again on Saturday. Stair guides are basically stops that you can set where you need them on the framing square and are secured with a thumbscrew. Once they are set, you can be assured that you have the same measurement each time you move the square down the stringer. At $5 for a pair, it they are definitely worth having if you are going to build stairs.
Saturday was warm and sunny when we woke up. By time we got out the door it had started raining, which we took as a sign that we should continue with stairs. We selected the best of the remaining 2x12s to use as stringers. I set the stair guides and we laid out the second pair of stringers. The FirstDay instructions state specifically not to use the first stringer as a template for the second one, so we laid them both out at the same time. I cut them with the Skilsaw even more carefully than the day before and Wendy had perfected getting the remaining wedges cut out cleanly.
As we put the stringers atop each other, I felt confident that these were much more accurate. Imagine our despair when this set didn't match either! In the depths of our madness we mixed and matched all four stringers and found that we actually had a pair (one from each day) that matched!
We tacked each stringer up in the bay to see if they fit and sat level. We did have to account for the fact that the gable wall framing outside of the bents is 2x6 stock on edge - this gave us about an inch gap from the stringer to the beam at the top which will have to be padded out with 1 inch stock, but I faked it with 3/4 plywood this time. We also had to take that into account where the stringers passed between the posts, since the extra inch would change how wide the treads should be. The stringers fit, but were slightly off level, and looking at them it seemed that the length of the stringer was off by an eighth of an inch or less.
While the stringers were hanging, we measured the narrowest point of the stair bay (between the interior post of the stair bay and the the gable wall framing) to find the tread width at that point, dictating the width of the stairway overall. I cut the treads from some of the 2x12 stock we had determined couldn't be used for stringers and then Wendy cut the risers with the compound sliding mitre saw while I took the stringers down and went over them, checking for non-square cuts.
On each stringer, the top cut was out of square by about an eighth of an inch, and so I laid out the lines needed to trim it up. Again the day was getting late and so I decided to leave that for Sunday.
We woke up Sunday to a cold, partly cloudy day. Given the fact that it would be a short day, as we had to leave at noon to pick up the kids from their weekend, we got up early and got to work. I shaved the edge off the stringers and test fitting them showed they now sat correctly. We pulled them down and got ready to assemble the stairs in the kitchen aisle when Wendy pointed out that we wouldn't be able to move the assembled stairs into the bay when we were done since the fit would be exact. That meant we had to clean up and move the scaffold frames and planks, which had been stored right near the back door. After an hour of moving and sweeping up the mounds of sawdust we created making stringers, we laid the stringers in place and started putting treads and risers on. We started with the top riser and then worked our way down, since the risers need to go down behind the treads. We got a couple of stairs done before it was 11:30 and we had to start cleaning up to go home.
After starting the first set of stairs, I am not ready to claim that we are accomplished carpenters. We still fall squarely into the novice category, but I have a healthy respect for the talent it takes to do stairs right. I also learned a whole lot about how it works, and have some ideas of how we will do the basement stairs (mostly gained from conversations with Pop), but I will leave that for another time since this post is so long already.
posted by SKelly | 10:44 PM
|
0 comments
![]()
![]()